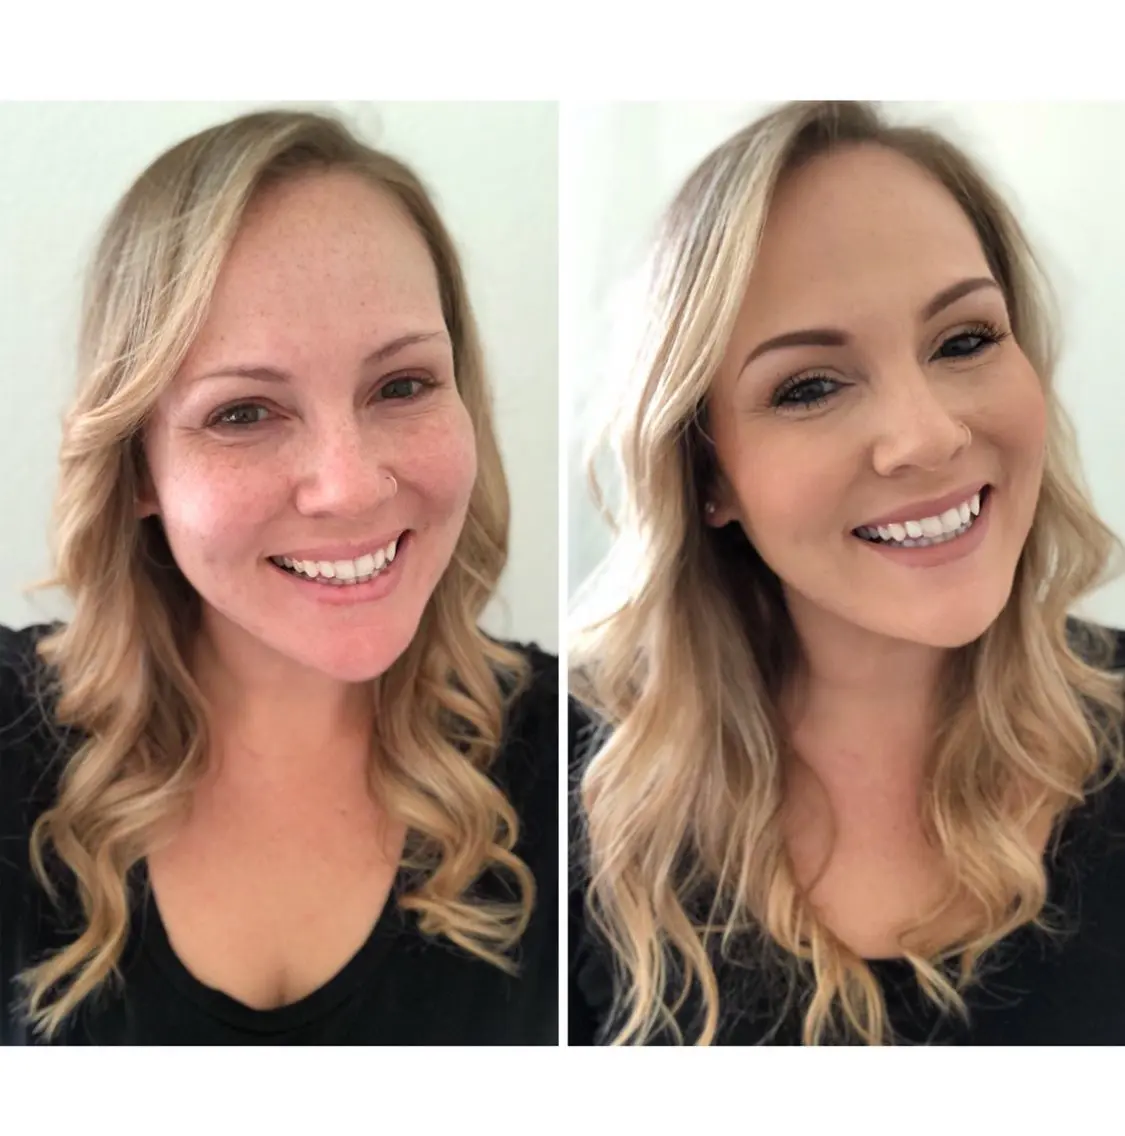
Today I am sharing my everyday makeup routine. One of the questions I get asked on my Instagram account is for a tutorial on my daily makeup routine. I’m not too great with videos (so awkward) so I put this blog post pictorial (?) together showing how I get ready on a typical morning. Some days I do a little more and some days less but on average, this is what you will usually catch me doing at my vanity table Monday through Friday.
It would be an understatement to say I like makeup. Fun fact: I used to work at Sephora in college and then at MAC Cosmetics as a makeup artist in grad school. Makeup has always been one of those things I just genuinely enjoy. I loved doing makeup for customers who normally went barefaced and showing them how a little blush here and a little lipstick there could be a fun addition to their own beauty routine. Nowadays, it continues to be a fun little hobby of mine.
Most of the products mentioned here are ones I talk about in my favorite makeup products , non-makeup beauty staples and must have makeup brushes post. If you’re interested in a little more product detail, feel free to check those out!
You can also click here to check out my IGTV video I created on my Instagram of my foundation demo!
Part One: The Base
Start off with a clean, dry face (hello freckles!) that’s been primed for makeup. I use Hourglass Mineral Veil Primer and just apply it with my clean fingers. This primer is a little pricey but it’s one of the few I feel truly holds my makeup in place all day and a little really does go along way so a bottle lasts me forever. At this stage I also apply a thicker concealer like MAC Studio Finish to any blemishes I want hidden.
Next, I apply my foundation. My favorite is Estee Lauder Double Wear Foundation or Too Faced Peach Perfect Matte. Both provide amazing coverage and last all day long. I apply the foundation in little dots all around my face then using a stiff buffer brush, I use dabbing motions to blend the foundation into my skin. I typically use the Marc Jacobs Face Brush, the Morphe M439 or I also love using a damp Beauty Blender. Ps: If you’re looking for a more affordable foundation option, you can check out my post on the best drugstore foundations!


Part 2: Brows & Eyes

I typically use anywhere from one to three colors on my eyes. It usually depends on how much time I have in the morning and how defined I want my eye look to be. The first thing I do is use a fluffy blending brush (MAC 224) to blend a little color into my crease. I use back and forth windshield wiper motions to get the most natural blended look. Any medium toned matte brown shade will work for this. Some I use and love are: MAC Always Sunny, MAC Soft Brown, MAC Texture, and Makeup Geek Creme Brûlée. Some days, this is all I do in the way of eyeshadow and then I call it a day. Like when I sit down to get ready and realize I have less than ten minutes for both my makeup and my hair.


Time for mascara! I use a Shu Uemura lash curler before brushing on my mascara. I’ll admit I’m a little high maintenance when it comes to mascara. I use one for my lower lashes and one for my upper lashes. For the lower lashes I use Maybelline Lash Discovery because the brush is teeny tiny and coats all the little baby lashes I got going on. For my upper lashes, I have been loving Lancome Monsieur Big. It lengthens, thickens, doesn’t get clumpy and holds my curl all day. UPDATE: I have been obsessed with L’Oreal Bambi mascara lately. It works just as well as the Lancome mascara at a fraction of the price! One issue I have found with my lashes lately is that my mascara will smudge just a teeny bit on my upper lid. This happens with almost every mascara I use. I have found that since using the Grande Lash MD Serum, this is a problem I have been having now that my lashes are little longer. Not an awful problem to have I suppose. Nothing a quick check in the mirror or a switch to waterproof mascara can’t rectify. If you’re not into using a lash serum though I HIGHLY recommend Lancome’s Cils Booster XL lash primer. It definitely makes a difference and gives a little oomph to short thin lashes. For other affordable mascara options, check out my favorite drugstore mascara post!
Part 3: Bronzer, Blush & Highlight

Almost done! For blush I most often use a peachy pink or bronze color. Some of my faves are from MAC in the colors Melba, Margin, Warm Soul, Modern Mandarin and Style (shown above). I also love Tiger Lily and Wild Honey from Becca. I use a Morphe E4 angled brush or a Real Techniques blush brush to apply the color to my cheekbones
To highlight, I use a Morphe M510 or M501 brush to apply my highlight to the top of my cheekbones. I usually add a little down the bridge of my nose and on the cupid’s bow of my lips. My favorite highlighter is Champagne Pop from Becca but I also love Opal (also Becca) and MAC Whisper of Gilt, which is a more golden highlight.
Part 5: Lips & Final Touches

Finally made it to the end! Once my lips are done, I set my makeup by misting my face with a little Urban Decay All Nighter Setting Spray and I call it day! Whew! Typing all this out made me feel like I spend 3 hours in the morning but it really takes me less than 20 minutes to do both my makeup and hair from start to finish. Not too bad if ya ask me! When I have less time I just adjust my routine accordingly. This has been my go-to look for the past year or so. It’s polished yet still simple which is perfect for a typical day at work! What are some of YOUR favorite go-to products for your everyday looks?
Please note that some of the links above are affiliate links, and at no additional cost to you, I will earn a small commission if you decide to make a purchase after clicking through the link. The products linked are ones I use personally and wholeheartedly recommend.
Thank you for your continued support!







Leave a Reply